Membuat Logo Pada T-Shirt

 Step 1:
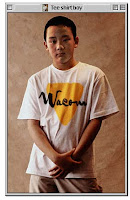
Here's a great shot of a young man in a white t-shirt-- let's put a logo on his shirt, and turn on Photoshop's power with the Wacom pen to make the logo ripple with his shirt.
Step 2:
Create a layer above the t-shirt by the Layer icon-- we'll patapping on int in this layer with the airbrush to create our distortion graphic. Fill the layer with 50% gray-- this will be our designated "neutral" for the distortion.
Step 3:
Let's get Photoshop's airbrush tool set-- go to the Brush Dynamics icon at the top of your screen (or in the Options palette for those of you who are pre-6), and set to to Pressure: Stylus. Set the layer for 75% opacity-- that way you can see Tee Shirt Boy underneath.
Step 4: Paint in your layer with black-- try to match the darker areas of the underlying image. The Wacom pen's pressure sensitivity lets you get as much or as little black as you want, merely by changing how hard you press.
Step 5:
Now paint in the white highlights-- go ahead and change the opacity up to 100% if you're curious how the layer looks. Don't worry about getting too exact-- here, close is good enough. Copy and paste the gray layer into a new document and save it as a grayscale image-- this is your distortion image.
 Step 6:
Place the logo right in the front of the shirt. Go to Filter-- Distort-- Displace, and set your H and V scale to whatever you think sounds good (be prepared to experiment a bit here). Select the distortion image you just created, and hit Open.
Step 7:
You'll see a weird distortion effect-- change the layer mode to Hard Light and lower the opacity a bit.

Burn and dodge the logo layer for a little added three-dimensional touch, and there you go!
source: http://www.wacom.com/tips/tip.cfm?ID=56&category=Photoshop&step=1


2 comments:
Nice blog.
kang aku agung komdandong daegu kang minta no hpnya situ kang dulu udah dikasih mianne hilang
Post a Comment