Friday, February 8, 2008

ISO dan Shutter Speed


ISO atau ASA dalam Photography adalah angka yang menujukkan seberapa banyak cahaya yang mampu diserap oleh sensor kamera.
Pada Canon EOS 30D, kisaran ISO dimulai dari 100-1600. Semakin besar angka ISO maka semakin sensitif kamera sensor terhadap cahaya.
Pada kamera digital ada empat cara untuk mendapatkan lebih banyak cahaya :
1.Menambah bukaan lensa / aperture
2.Menambah shutter speed
3.Menambah ISO
4.Menambahkan sumber cahaya buatan (Flash)
Angka shutter speed yang besar, berarti semakin lama bukaan nya, konsekuensinya gambar menjadi blur
Berikut adalah setelan shutter speed untuk berbagai mode:
Subject Shutter Speed*
Landscape 60
Portrait 125
Children 250
Animals 500
Sports 1000
Race Cars 4000

Angka ISO yang besar akan menimbulkan noise yang mengurangi kualitas gambar.
Berikut adalah setelan ISO untuk berbagai kondisi:

Bright sunshine 100
Mild shade or overcast 200
Deep shade 400
Indoors on a sunny day 800
Indoors at night 1600

Faktor lain yang menyebabkan gambar blur adalah,goncangan dan jarak fokal
Berikut adalah setelan yang bagus antara jarak fokal dan shutter speed:
Focal Length S hutter Speed (for no blur)
28mm 30
50mm 60
100mm 125
200mm 250
300mm 350


Read More......

Sunday, February 3, 2008

WinMount


WinMount adalah program yang relatif baru. WinMount benar-benar unik, selain bisa nge-mount berbagai Iso file juga mampu nge-mount RAR file.


Features
Mount ZIP RAR 7-ZIP archives ke virtual CD-ROM tanpa uncompressing;
Support mounting WIM format;
Support compressing files;
Support multi-volume RAR archives;
Support solid RAR archives;
Support RAR archives with password;
Support most image formats including VCD, DVD;
Mount IMG and RAW IMG archives on a virtual CD-ROM

Supported archive formats
Support ZIP archives;
Support RAR;
Support 7-ZIP;
Mount WIM (Windows Imaging Format);
Mount CUE;
Mount BIN;
Mount CCD (CloneCD),
Mount BWT (Blindwrite),
Mount MDS (Media Descriptor File);
Mount CDI (Discjuggler), NRG (Nero);
Mount PDI (Instant CD/DVD);
Mount B5T (BlindWrite 5);
Mount ISZ (Compressed ISO images) ;
Mount CD-ROM image files.


Read More......

File dengan extensi .daa


File dengan extensi .daa (direct-access-archive) hanya bisa di extrak dengan menggunakan Power Iso


Feature dari Power Iso, antara lain :
1.Mendukung hampir semua CD/DVD-ROM image file format(ISO, BIN, NRG, CDI, DAA dll).
2.Open dan extract ISO File.
3.Membuat ISO file dari hard disk files atau CD/DVD-ROM.
4.Edit ISO file .
5.Mengubah image files dari ISO/BIN atau dari format lain. PowerISO dapat mengubah hampir semua format image file kedalam standar format ISO .
6.Membuat bootable ISO file.
7.Membuat floppy disk image file.
8.Optimize files, untuk mengirit ruang sewaktu nge-saveISO file.
9.Memount ISO file dengan virtual drive.
10.Mudah digunakan dengan menu yang user-friendly , drag and drop, clipboard copy paste....


Read More......

Friday, June 29, 2007

File Splitter


Bila kita kirim e-mail keteman, pacar atau relasi adakalanya kita perlu menyertakan file attachment, atau pun file sharing lewat messenger. File yang dishare berukuran besar perlu waktu lebih lama didownload, dibanding file berukuran lebih kecil. Hal tersebut bisa kita siasati dengan file splitter, caranya....???

Download dulu program file splitter tentunya yang free, semisal HJ-Split


di http://www.freebyte.com/hjsplit/, program ini hanya berukuran 278 kb dalam bentuk zip file, anda hanya perlu meng extract, tidak perlu diinstall. Satu hal yang harus diingat, teman yang ngedownload file dari kita perlu juga memiliki program serupa, yaitu untuk menggabungkan file yang dipecah tersebut.


Read More......

Monday, May 28, 2007

Pc Clone


Anda hanya punya satu PC dirumah...?, sedangkan anggota keluarga yang lain ingin menggunakan PC tersebut secara bersamaan..?, ingin tahu caranya...


NC Computing memberikan solusi yang murah dan effisien untuk meng-clone Personal Computer dengan NC Computing X-300 kit. Satu buah X-300 kit bisa digunakan untuk 4

pengguna, dan dengan dua buah X-300 kit memungkinkan untuk 7 pengguna. Satu PC hanya hanya bisa menggunakan maksimal 2 buah X-300 kit. Kita hanya perlu menambahkan monitor, mouse dan keyboard


Alat ini cocok sekali untuk dipakai di sekolahan ataupun tempat kursus komputer, karena bisa menghemat dana untuk pembelian hardware dan juga energi listrik. Alat ini sudah bisa dipesan di Indoasia Teknologi

Read More......

Monday, March 26, 2007

uTorrent


Bila anda seorang pe-download serius, tentunya sudah tak asing lagi dengan yang namanya "Torrent". Sampai saat ini hanya torrent lah spesialis downloader file berukuran besar. Btw, aku pernah ngedownload file sebesar 15 Gb, ruar biasa ...!

Banyak sekali Torrent Client atau Torrent downloader yang bisa didownload dengan gratis... Tentunya dari sekian banyak downloader terdapat kelebihan dan kekurangan masing- masing. Untuk lebih detail bisa dilihat disini.Anda suka yang mana..?, Kalau aku udah kadung "jatuh hati" pada u Torrentprogramnya kecil dan ringan, punya browser built in, so kita bisa langsung nyari apa yang kita inginkan tanpa harus memakai torrent searcher yang lain, seperti ToSearch atau Torrent Master.


Screenshoot....

Read More......

Wednesday, March 21, 2007

Membuat Logo Pada T-Shirt


Step 1:
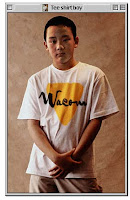
Here's a great shot of a young man in a white t-shirt-- let's put a logo on his shirt, and turn on Photoshop's power with the Wacom pen to make the logo ripple with his shirt.

Step 2:
Create a layer above the t-shirt by the Layer icon-- we'll patapping on int in this layer with the airbrush to create our distortion graphic. Fill the layer with 50% gray-- this will be our designated "neutral" for the distortion.

Step 3:
Let's get Photoshop's airbrush tool set-- go to the Brush Dynamics icon at the top of your screen (or in the Options palette for those of you who are pre-6), and set to to Pressure: Stylus. Set the layer for 75% opacity-- that way you can see Tee Shirt Boy underneath.

Step 4:
Paint in your layer with black-- try to match the darker areas of the underlying image. The Wacom pen's pressure sensitivity lets you get as much or as little black as you want, merely by changing how hard you press.
Step 5:

Now paint in the white highlights-- go ahead and change the opacity up to 100% if you're curious how the layer looks. Don't worry about getting too exact-- here, close is good enough. Copy and paste the gray layer into a new document and save it as a grayscale image-- this is your distortion image.

Step 6:
Place the logo right in the front of the shirt. Go to Filter-- Distort-- Displace, and set your H and V scale to whatever you think sounds good (be prepared to experiment a bit here). Select the distortion image you just created, and hit Open.

Step 7:
You'll see a weird distortion effect-- change the layer mode to Hard Light and lower the opacity a bit.

Step 8:
Burn and dodge the logo layer for a little added three-dimensional touch, and there you go!


source: http://www.wacom.com/tips/tip.cfm?ID=56&category=Photoshop&step=1

Read More......

Model Kita